Activate TouchControl 5 or TouchMonitor 5 Demo Mode
How to use the presets as demo with the Compact Line
Activate TouchControl 5 or TouchMonitor 5 Demo Mode
How to use the presets as demo with the Compact Line
Demo Mode is great if you want to check out presets without having any audio available.
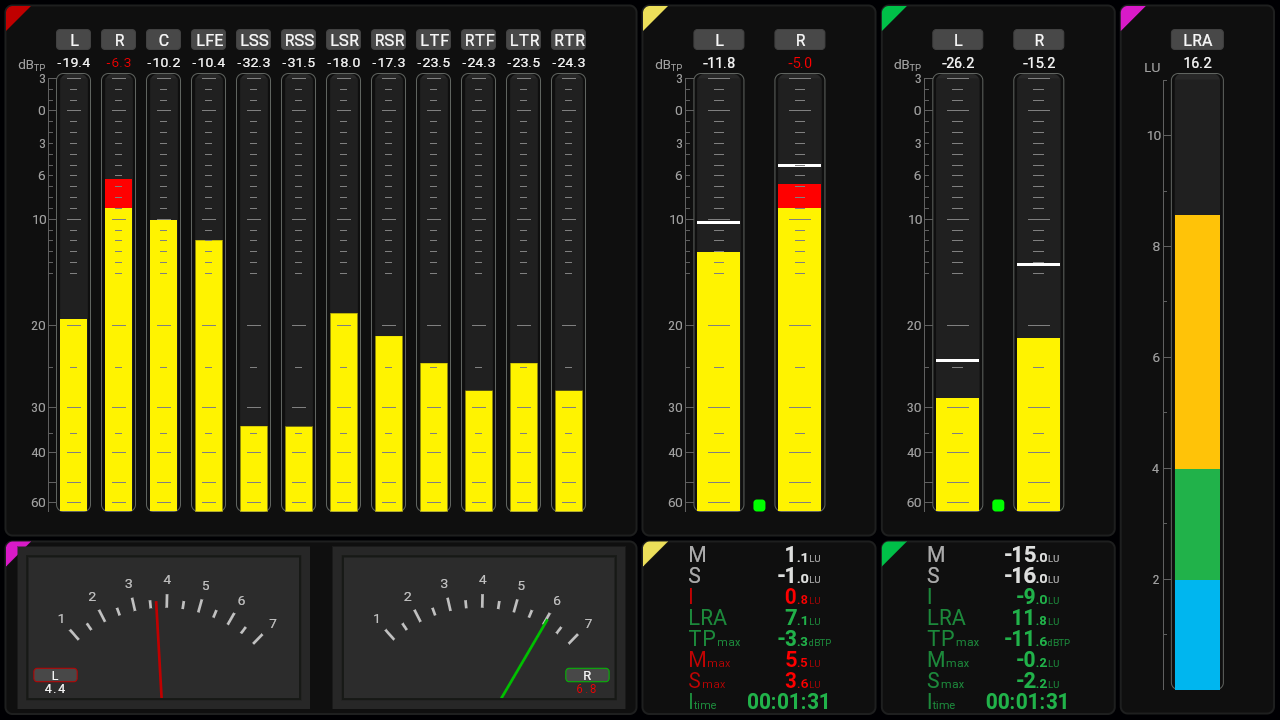
In Demo Mode, TouchControl 5 will play a 7.1.4 demo song on channels 1 - 12.
In TouchMonitor 5, the 7.1.4 demo song only provides the signals for testing the displays.
Activate the Demo Mode
 |
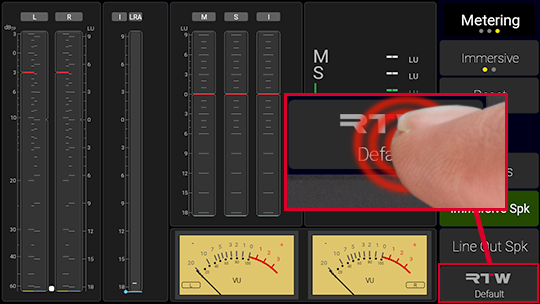
On the devices, touch the RTW <Preset-Name> button below right. |
| |
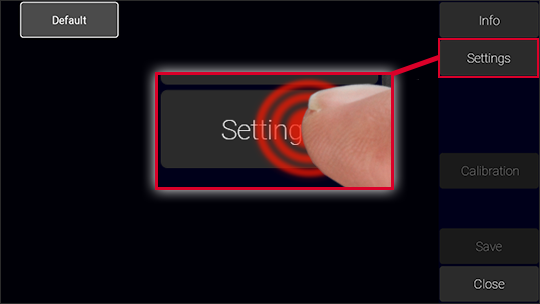
On the Presets overview page, touch the Settings button above right. |
| |
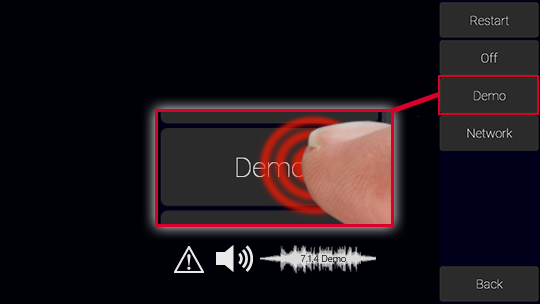
On the Settings page, touch the Demo button on the right. It turns green. | |
 |
The demo song directly starts to play, sound will be on the loudspeakers (not TouchMonitor 5), and signals will be displayed on the instruments. | |
| |
The functions of licenses that have not yet been activated will be temporarily enabled for testing purposes. |
| |
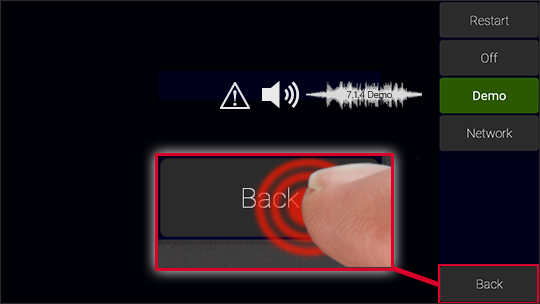
Touch the Back button to get back to the Presets overview page. |
Load the preset you want to use
| |
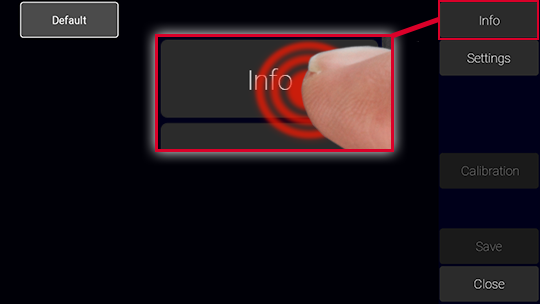
Touch the Info button at the top right. |
| |
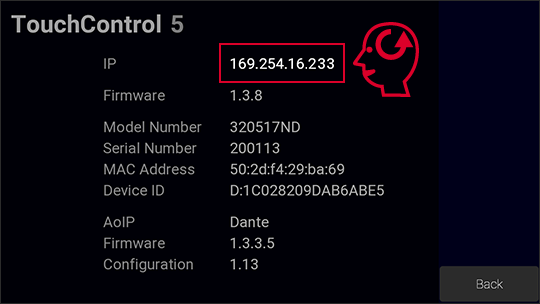
On the Info page, determine the IP address of your device (IP in the first line) and make a note of it. | |
| |
Touch the Back button and on the Presets overview page the Close button to get back to normal operation. |
| |
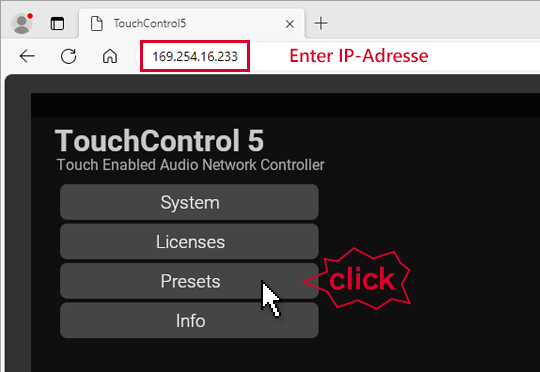
Open a web browser in your network. | |
| |
Enter the IP address you have determined. | |
| |
The WebApp with its main page opens. | |
| |
Click the Presets button at the top left. |
| |
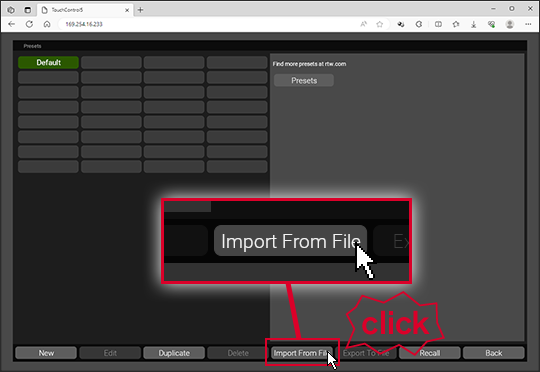
On the Presets overview page, click the Import From File button below. | |
| |
The dialog window for browsing the preset file opens. |
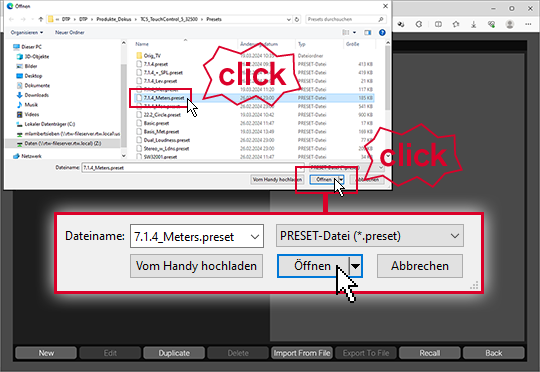
| |
Choose the downloaded preset file (*.preset) and click it. | |
| |
Click the button Open. | |
| |
The preset will be loaded into the device and displayed on the Presets overview page of the Web App. | |
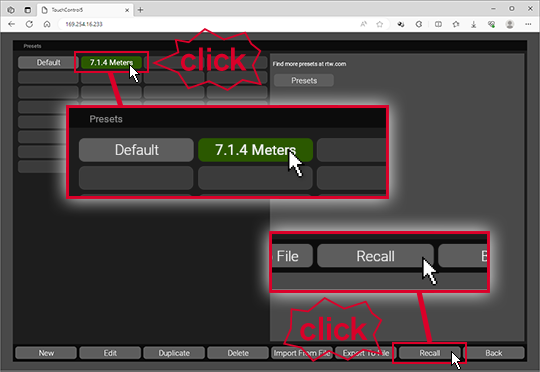
| |
Click on the button of the new preset, it turns green. | |
| |
Click on the Recall button below right. | |
| |
The preset will be loaded and directly displayed on the device ready for use. | |
 |
||
Adapt the preset to your needs
You may adapt the preset to your needs, especially the routing.
|
Again open the Web App. | |
|
Click the Presets button. | |
|
On the Presets overview page, click the button of the preset you want to adapt. It turns green. | |
|
Click the Edit button at the bottom left. | |
|
The main page of the preset opens. | |
|
Click on one of the applications on the left if you want to adapt it. | |
|
Click the View button at the top left if you want to change the screen layout. | |
|
Click the Routing button at the top left if adjustments to the preset channel assignment are necessary. | |
|
Finally save the preset. | |
|
Select it on the Presets overview page and click the Recall button below right if you want to use it directly. | |
|
The preset is displayed on the device and ready for use. | |