Whether you need to automate loudness resets, trigger presets from a console, or integrate with a DAW or other third-party tools, actions open up a world of flexible control.
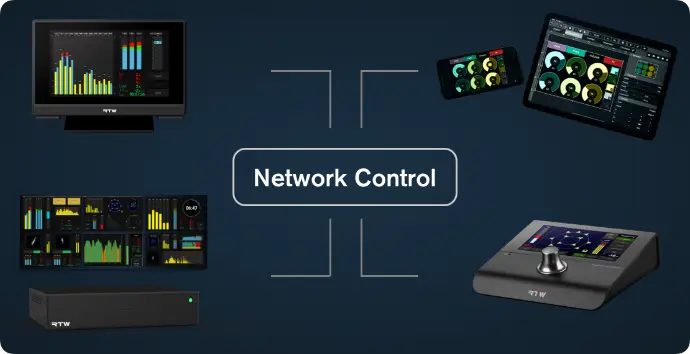
Multi-Device Control
With OSC integration, RTW devices TMxCore, TouchControl 5 and TouchMonitor 5 can send commands simultaneously to multiple devices on the network.
This makes it possible to start, stop, reset loudness measurements synchronously with a playback, or load presets across all connected units with a single action, ensuring consistent operation throughout the setup.
A TouchControl 5 positioned at the operator’s desk can be used to navigate and control a TouchMonitor 5 remotely, providing centralized access without the need to operate each device directly.
Transmit: Outgoing Commands
With a single button press, your RTW device can send OSC messages via TCP/UDP and/or HTTP requests. You can use the dedicated action button, but since OSC is available throughout the interface, other buttons can also be configured to send one or more commands.

Action Button
A dedicated Action button can be customized with its own size, color, and label.
In addition, most other buttons can also be assigned to transmit actions.

OSC Everywhere
Any button in a preset can send OSC commands in addition to its primary function.
For example, pressing the TALK button can simultaneously trigger one or more OSC commands, such as activating the DIM function in the monitoring application or switching on speakers when the corresponding output is selected.
Multi-Command
A single button can send not just one, but multiple commands at once, and OSC and HTTP commands can be mixed in one action.
Multi-state
For a toggle button (e. g. TALK), the button’s state is transmitted. When the button is ON, TRUE is sent; when it is OFF, FALSE is sent.
System Events
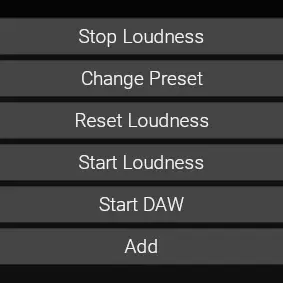
You can define actions that are automatically triggered when specific events occur. Supported events are:
- Preset Changed
- Demo Mode Changed
- Sample Rate Changed
TouchControl 5 Only
- Headphones Detected (an automatic argument with TRUE or FALSE is added)
- Line Out Detected (an automatic argument with TRUE or FALSE is added)
Preset Events
Presets include an Events section.
At this stage, one event is available, with more to follow:
• Preset Loaded: Triggers a defined action automatically when the preset is loaded.
Action Settings
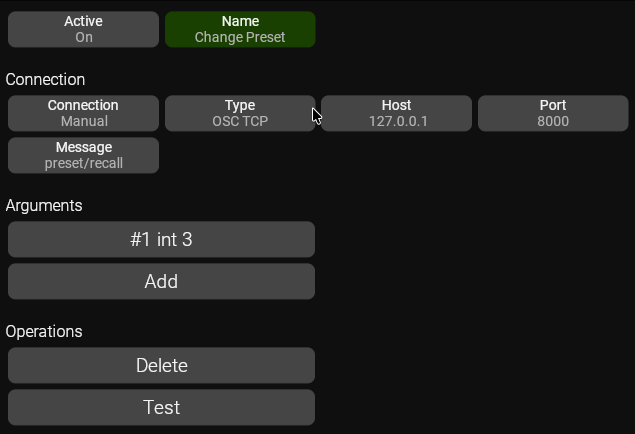
Active: Indicates whether the action is active
Name: The name of the action
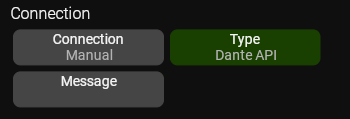
Connection. In System Settings you can pre-define connections, or you can manually set type, host and port for each individual button
Type: There are three types of commands:
OSC TCP
OSC UDP
HTTP Request
TouchControl 5 Dante and TouchMonitor 5 Dante: Dante API
Host: The IP address of the target device
Port: The port of the target device, typical 8000
Message: If Type is OSC, this is the Address.
If Type is HTTP, this is the URI
Arguments: here you enter the argument(s) for your action.
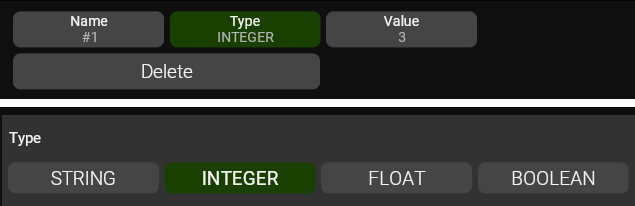
Arguments
Name: You can give your argument a name
Type can be STRING, INTEGER, FLOAT or BOOLEAN
Dante API: Subscribe and unsubscribe
For TouchControl 5 Dante and TouchMonitor 5 Dante, Dante API is available as an action type.
This enables direct subscription and unsubscription of channels within your Dante network, and this goes for any device in the network, not only the device itself.
Combined with the Preset Loaded event, this enables a powerful new feature: Dante channels can now be configured automatically when a preset is loaded.
Connections
Implementation
Two messages are supported: subscribe and unsubscribe.
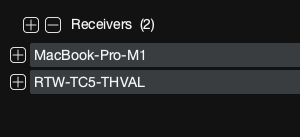
In all cases, you need to know the Dante Device Names, and the Dante device name is the name you see in Dante Controller, in this case there are two devices: "MacBook-Pro-M1" and "RTW-TC5-THVAL".
Dante Device Names
Subscribe
To create a connection, you need to specify 4 arguments.
FROM Device Name (STRING)
FROM Channel (INTEGER)
TO Device Name (STRING)
TO Channel (INTEGER)
Channel numbers are ZERO-based, so channel 1 is 0.
So, as an example, if I want to transmit channel 4 on my MacBook to channel 7 on my TouchControl 5, I enter the lines shown to the right.
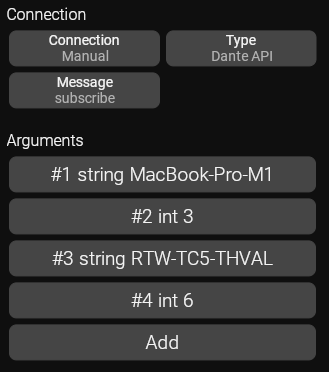
Enter these lines to subscribe to channels
Unsubscribe
To unsubscribe, I only need two arguments, the name and channel I want to unsubscribe.
So, if I want to remove the connection I made above, I'll enter the lines shown to the right.
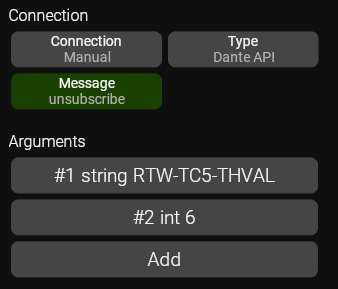
Enter these lines to UN-subscribe to channels
Dante API Demo Preset
This preset demonstrates how Action buttons can be configured to switch between different Dante routings.
IMPORTANT
This preset will not function without prior adjustments.
Since Dante routing is based on Dante device names, you must edit the ‘Feed A’ and ‘Feed B’ buttons to match the exact names of the devices you are routing between.
Connections
In System > General, you’ll find the Connections section.
Connections allow you to define OSC settings (IP address, port, protocol, action type, etc.) once and reuse them across all buttons and actions.
If a setting changes, for example an IP address, it only needs to be updated in one place, rather than on every individual button.
Localhost
A predefined connection, Localhost, is included. This represents the device itself.
Use this connection when sending OSC commands to the device itself to access features that are available exclusively via OSC.

Connections
Receive: Incoming Commands
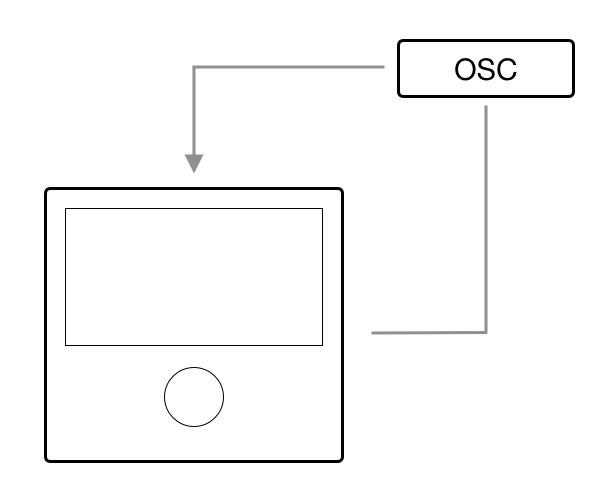
RTW devices can also react to OSC commands.
This means external systems can control core functions such as:
- Recalling presets
- Resetting loudness
- Triggering monitoring actions
This makes it super easy to integrate with broadcast consoles, Stream Decks, or other controllers.
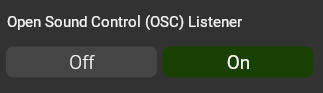
Important: Allow incoming OSC messages!
For a device to receive incoming OSC messages, the Open Sound Control (OSC) Listener must be enabled.
For security reasons, this setting is disabled by default. However, it must be turned On to allow incoming OSC communication.
You find it in System > General.
OSC Receive Implementation
The OSC receive implementation uses TCP on Port 8000.
Below is an overview of the available OSC actions, addresses, types, and arguments.
Controlling a Device from Itself
OSC unlocks capabilities that go beyond standard device operation. For example, you can create buttons to trigger preset changes or design a multifunction button that enables talkback while simultaneously muting your speakers.
While OSC is commonly used to control external devices remotely, it can also be used to trigger commands within the device itself. To do this, simply assign the OSC action to the device’s own IP address.
You can find the current IP address in the INFO tab and use it for your OSC commands. However, if the IP address changes, all assigned action buttons would need to be updated. Fortunately, there’s an easy way to avoid this.
Use this special IP address:
127.0.0.1
RTW devices use port 8000 for receiving OSC messages.
Using 127.0.0.1:8000, commands are always sent to the device itself, regardless of its actual network IP address.
Even easier, use the Connection that is named Localhost. This will automatically use the correct IP address and port.
This ensures reliable, stable operation without the need to reconfigure your action buttons.
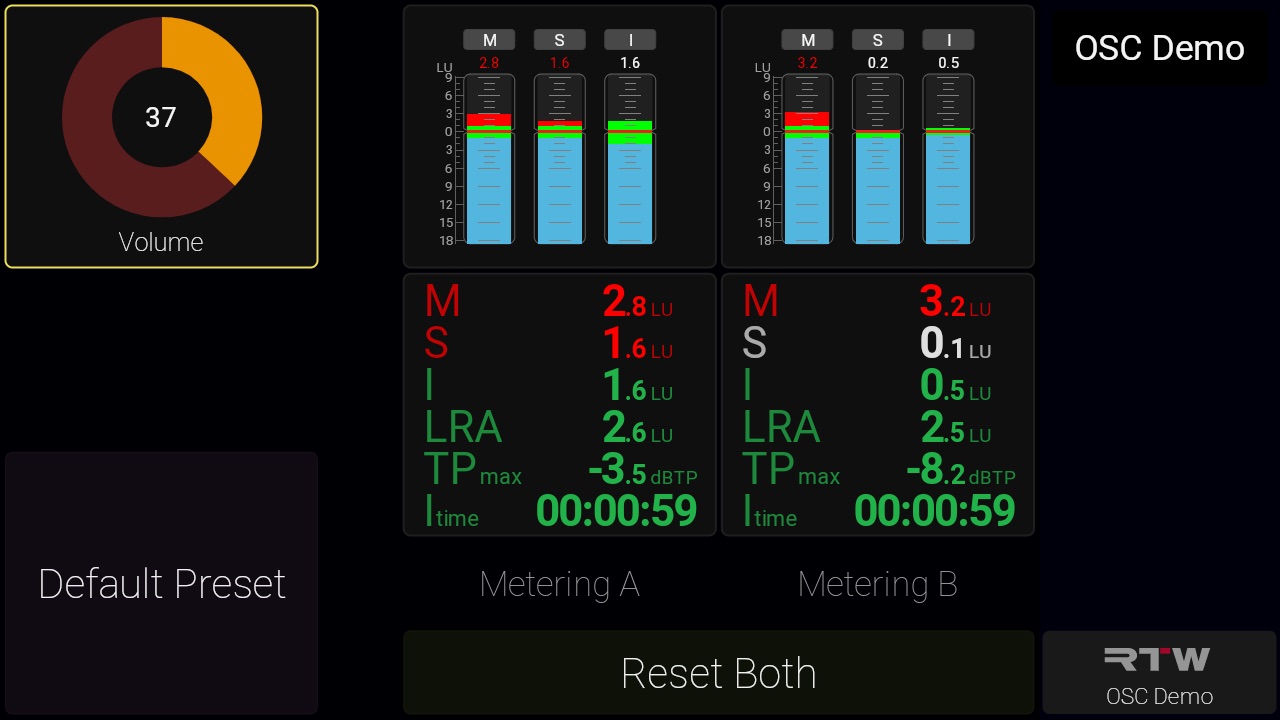
Demo Preset
Here you can download a preset for TMxCore, TouchMonitor 5, and TouchControl 5.
Reset Multiple Loudness Instances
This preset demonstrates how an Action button can be configured to reset the loudness measurement of two metering applications with a single button press, something that would normally require two separate buttons.
Recall a preset
It also shows how to recall presets: in this example, pressing the Default Preset button recalls the Default preset (preset number 0).